Sunday, January 12, 2014

Crepes With Caramelized Bananas


Happy Sunday!
I was craving something sweet but nothing overkill on unhealthy scale.  I've been keeping a pretty strict diet (which is hard to do, when I love baking all the time).  But, it's been working and I'm well on my way to where I wanna be health-fit wise.

Looked over Pinterest for awhile, but nothing easy was catching my eye.  I decided to just go for basic crepes and do my first attempt at caramelizing[I hate spelling that word] some bananas.  Bananas have been on my mind lately and I'm glad I incorporated them in this dessert (also a good brunch option). This batter made approximately 6 crepes--maybe more, since one of mine was really thick.

Crepes:  Recipe we've had around for quite some time

Ingredients 
4 eggs
1 1/3 cup of milk
2 Tbs butter, melted
1 cup all-purpose flour
2 tbs granulated sugar
1/2 tsp salt 

Directions
Whisk all ingredients together until smooth.  Preheat the crepe pan/frying pan on medium with some butter or pam sprayed in the pan.  Ladle a spoonful of batter in to the pan, use your wrist skills to spread out the batter throughout the pan.   About two minutes and the crepe should be ready to go.  As you cook more of these, it will come naturally and you'll be able to tell when they are ready.  Use a spatula to slide around the edge to remove from the pan.


4 eggs (I use hormone free eggs)
Lightly whisked eggs before adding
other ingredients

Batter after whisking


Low-Medium Setting


Preheat the pan 1-2 minutes

Slice bananas approximately the same size (I used three)


Ooops!
Caramelizing Bananas
3 Bananas 
Sugar
Pan
Pam (or butter)

Slice Bananas (as shown above)
Flip each banana slice in sugar (granulated)
Place slices in preheated pan (medium, as shown above for crepes)
Turn after 4-5 minutes 
Second side gets done quicker than the first (approx. 1-2 min)

***Keep in mind: Each stovetop is different.  Cooking times may vary.  You'll see a brown sauce under the bananas and you'll smell a sweet, amazing aroma when it's time to flip them.  They do burn quick.  Careful!
I sprinkled powdered sugar in each crepe, rolled them up and placed bananas on top.  I sprinkled a little more powdered sugar on top.  

ENJOY.


Friday, January 3, 2014

Bottle Cap Crafts


Hello!
Happy Friday!  This past weekend, I had a very successful day with my cousin and my sister.  We had a craft day, and made some really neat bottle cap crafts.  We created double sided ornaments, one sided ornaments, and magnets.

Items we used: 
Bottle caps (ours were collected for a long time, and we had a ton!)
Paper (solid colored, printed, wrapping paper)
Stickers (any type, round ones preferably that fit inside the bottle cap)
Acrylic Paint
Paint Brushes
Scissors
Paper Cutting Board
X-Acto Knife
Custom Cutting System (mine is by Creative Memories)
Glue (hot glue, glue-all, mod podge)
Glitter
Sequins
Beads
Thick Magnets (to place on back)
Hemp String
Buttons

It's a lot of fun and it's something we will continue to do(we have a business idea in our heads!)


These were also waiting to be mod podged and dried


Hope everyone has a great weekend, and Happy New Year! Looking forward to all the wonderful things 2014 has in store for everyone!


Saturday, December 28, 2013

Chocolate Covered Bacon


Hello All!
I decided to whip up some chocolate covered bacon, and it turned out delicious.  Instead of using regular bacon, I decided to use turkey bacon.  When I told a few people I chose to do that, the looks they gave me were not the best. Let me tell you why I chose to use this instead of regular bacon.
Have you ever had the chocolate covered bacon at the fair? I have, it's one of my favorite things to get while i'm there!  But, at the fair, you always end up getting full bites of chocolate covered fat.  It's still delicious and fatty stuff is notorious at the fair--they wouldn't want it any other way!  Turkey bacon has a great marbling of fat all throughout the bacon strips.  You never get a full bite of chocolate covered fat with turkey bacon.  Its just a lot less fattier in general and I guess you could say it's "healthier" bacon is bacon, you can't really get healthy out of that.

I used some good melting chocolate and I don't think I would use anything other than that.  However, there is an alternative choice: chocolate chips (whichever you prefer, dark or milk chocolate) and then add about a tablespoon of shortening to the chocolate chips (or vegetable oil).


DIRECTIONS
You can melt the chocolate with the oil or shortening in a microwave safe bowl or over the stove.  Be careful to not scorch the chocolate, especially on the stove top you want to keep it low and constantly stir.  With the microwave you don't want to have it microwaving for more than 30 seconds at at time.  The bowl gets hot and continues to heat the chocolate while you stir after each increment of time.  Even when there are small chunks of chocolate left I was able to stir them out just by using the heat of the bowl and stirring.

Make sure that it is melted enough where when you tip the bowl it easily moves around.  If it is not thin enough it will be hard to dip the bacon.  Once the bacon cools and it gets as crispy as it can start dipping! I used tongs to place the bacon into the bowl and flip it easy.  I found the tongs were much easier to use and the chocolate was even on both sides and it was a thin coat.  Place the done pieces on foil or wax paper and wait to harden/cool.

It turned out delicious (I've made it twice now)
The first batch was much crispier I had the stove top on a little bit higher when I made the first batch of bacon.  My second time making it the stove top was a little bit lower and the bacon took longer to make but it didn't crisp up as well.  I liked them both ways and did not have a preference!

ENJOY,
Kate


Sunday, October 20, 2013

SP00KY Cupcakes


Good Afternoon !
Hope your weekend was wonderful.  Monday, I decided to make my first batch of Halloween cupcakes! I am going to make more this week but I wanted to see how everyone felt about them before I made more.  Everyone enjoyed them!

Here's what I made:


How I created these:
1) My favorite Vanilla Cupcake recipe
2) Added purple food coloring gel
3) Made the cupcakes as directed
4) Let them cool
5) While they're baking, created the sculptable frosting (the purple toppers in picture)
Here is my link to my post on this wonderful sculptable frosting:
6) Frosted the cupcakes with the orange frosting (yes, it's store bought,
I know I'm sorry!)  
Once the sculptable frosting is done, I grabbed a chunk piece by piece flattened it out and used a curvy/flower like cookie cutter.  I did make mine quite thick (will make them thinner next time).  The toppers make the cupcakes much heavier! I didn't think the thickness of the toppers would make them weigh that much! I used black glitter decorative gel to write and draw on the frosting shapes.
7) I added coconut and some candy eyes to some of them to make monster/mummy cupcakes!
8) Get creative.  This was so much fun to do and it was actually very relaxing for me!

Next time:
I will be making my own frosting (not store bought!).  I also will be making the sculptable frosting thinner, meaning thickness wise.  Because of this I will continue to halve the recipe because I had lots of extra this time.  I only made 12 cupcakes!  I would have to experiment with how much I would have to make for a batch of 24. I will continue to use the same vanilla cupcake recipe. If you would like it please comment below!  


Sunday, October 13, 2013

Sculptable Frosting [Recipe + Review]


Good Morning!


I hope your weekend was fantastic.  These past two weeks have been pretty low key and boring for me.  I have been battling a bad case of Acute Mononucleosis (short form: mono).  It really kicked my butt.  I've been so stir crazy I decided to sit in the kitchen last night and practice for my halloween cupcakes I'm making soon.  I found a recipe on pinterest quite awhile ago, and I am glad that I pinned it.
You can find the original post here: http://thedecoratedcookie.com/2012/05/guest-post-sculptable-frosting-by-cheryl-of-sew-can-do/

Now, I usually don't have good luck with these type of recipes.  This one was awesome!  I actually halved it because I wasn't actually making any cupcakes to go with it or anything, I just wanted to practice.


This was a delicious frosting recipe!  If you are making it colored (which I did), just add a few drops and kneed the color into the frosting. For the halloween spirit, I dyed mine orange and will be doing an orange and purple batch when I actually make them for the cupcakes. 

After I kneaded the frosting with the orange dye

You can see the softness and consistency here

After you have your desired color, you can start designing and having fun! I used a rolling pin, a butter knife and cookie cutters.  I also have this sparkle gel by Wilton and I drew on them to make various things.  
I made them quite thick. Next time
when they are on the cupcakes they will be thinner.


Wednesday, October 2, 2013

Cupcake Cones!


Good Afternoon all!
My family is really busy, at all times.  My sister and I are both in school and we both work full time.  Among other obligations it is hard to find good quality family time.  My mom's birthday was this past Saturday, September 28th and we celebrated a few days early.  I decided to make cupcake cones, and here are my results.

My frosting was homemade and was thicker
I had a bit of a hard time drizzling, but I
had fun with it!


I had a little helper (:
Whip up your favorite cupcake mix, and fill up an empty ice cream cone about 2/3's full.  I should have filled a few of my cones up a little bit more.  If they don't come up just above the cone, it's going to be hard to frost.  
I made a few regular cupcakes as well. 
I used an interesting frosting recipe that I found in my mom's cookbook called "Jo's fudge frosting".
Ingredients 
1/4 cup of shortening
1/4 cup of milk 
1 cup of sugar
1/2 cup of chocolate chips
Directions 
Bring the first three ingredients to a boil, add the chocolate chips and remove from heat.  Mix together, and spread.  
This recipe was disastrous.
How it looked: soupy and tasteless
So, I decided to put my own spin on and it and make it something.  I added:
1 tsp of vanilla
1/2 cup of cocoa
Powdered sugar: to taste/to the thickness you want
A splash of milk

It turned out well after adding these ingredients and making it better.  I am still on the lookout for a good chocolate frosting.  Does anyone have any good frosting recipes?  Not icing recipes, just frosting. Please share them with me below I would love it!
Super moist! (Don't put the cupcakes in for as
long as the boxed package says, maybe about three
minutes less! Test it out!)

Momma and Sistaaa! (:


Thursday, September 19, 2013

Final New York Post!


Hello!  Hope everyone's week is going great!  I'm just getting back into the routine of work and seemed to have caught some food poisoning.  I'm thinking I know exactly what it's from, this food truck I had on Sunday right before we headed for the airport.  I felt pretty shady the rest of the day and have been continuing to feel very under the weather.  I can't seem to keep much down, even liquids are giving me grief.


AHHH.

I was quite happy to see this Barbie house

Hearst Tower, Midtown Manhattan
Cathedral of Saint John the Divine

Largest Cathedral in the world, & 4th largest Christian Church in the world. 

Street work advertisement. YMCMB 

Beautiful Brooklyn Bridge

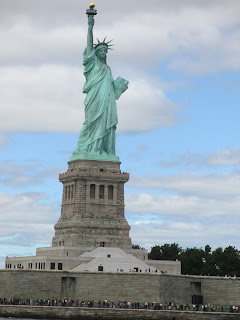
Statue of Liberty!


Our last night in NYC.

Met Batman! (:


Sailboat we saw on the ferry to Statue of Liberty!


Uptown Swirl Froyo! (:  Only place in NYC with Biscoff
flavored froyo. Biscoff is the Delta Airlines
cookie that they offer (its kinda like a graham cracker)
DELISH.


Oh! && we got on Good Morning America! How cool is that?! Sesame Street was actually on the show that day (Friday, September 13th).  It was awesome to see them in real life with their puppet masters.  I thought it would ruin the magic of the show being able to see the masters, but it didn't really! It was still neat to see.  My grandma absolutely loves GMA and she was so happy to see me on there (she called me twice!).
Crowd shot!

Hello America! 
These guys were wonderful.  They were stunt/break dancers.
They put me into their show, and jumped over me and three
others.  I'll see if I can get the video in here!